|
|
|
|
 |
|
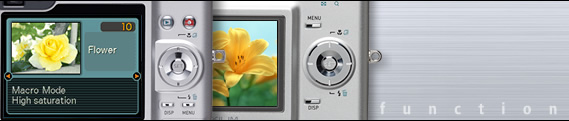
| Simply select the sample
scene that resembles the type of image
you are trying to record, and the camera
is configured automatically with the
applicable recording mode, Auto Focus
setting, and more. All you need to do
is press the shutter button for a perfect
image. |
|
|
|
|
|
 |
 |
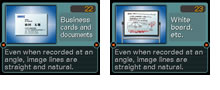
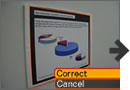
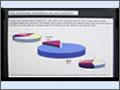
| These scenes are just
the thing for recording images of a white board,
documents, and other business items. An auto
keystone correct feature automatically corrects
for distortion in rectangular subjects and stores
the corrected image as a separate file. |
|
 |
 |
 |
|
|
 |
 |
 |
|
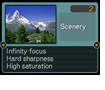
Sharp
infinity focus
This setup selects infinity focus and high saturation for crisp, clear
scenery shots. |
|
 |
 |
 |
|
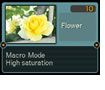
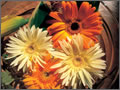
Macro
mode
This setup selects the macro mode to capture the fine textures and colors
of flowers. High color saturation also helps to make colors more vivid. |
|
|
|
|
|
|
|
 |
| This CASIO original image processing
function makes it possible for the camera to correct
brightness automatically when recording subjects
that are too far for the flash to reach. It helps
make images that normally might be blacked out brighter
and clearer. |
|
 |
|
| Recording of a movie with sound can
continue as long as there is memory available. A
built-in speaker lets you check the audio as soon
as you record it. Other audio features include audio
snapshot (with audio recorded at the same time as
the image or added later), and a Voice Recorder feature. |
 |
|
 |
 The
Macro Mode lets you move in to distances ranging
from 50 cm to as close as 6 cm for really
intimate close ups of everything from portraits to
flowers, pets, food, and more. The Macro Mode also
supports zooming up. The
Macro Mode lets you move in to distances ranging
from 50 cm to as close as 6 cm for really
intimate close ups of everything from portraits to
flowers, pets, food, and more. The Macro Mode also
supports zooming up. |
|
 |
| The histogram lets you check exposure.
It is a graph of image brightness that shows the
effects of current exposure settings. |
 Exposure Adjustment Exposure Adjustment
Separate histograms are indicated for individual
color components (R, G, B), so you can see when
red components are overexposed, blue components
are underexposed, etc. |
|
 |
| The camera automatically switches to
the appropriate focus mode when the shutter button
is pressed. If the camera detects that the subject
is in the range of 6cm to 50cm while the normal Auto
Focus Mode is selected, it will automatically switch
to the Macro Mode. This helps to images in focus,
even if the camera setup is wrong. |
|
 |
 |
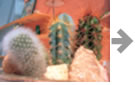
Previous model normal
mode produces an out
of focus image when subject
is too close. |
Recording with Auto Macro automatically
switches to the Macro Mode to keep image in focus. |
|
|
 |
| 7-point Multi AF means you never need
to worry about focusing again. When you press the
shutter button, the camera automatically selects
one of seven focus points, based on which one is
aligned with the nearest subject, and focuses on
that point. This helps to avoid loss of foreground
images, and minimizes the change of images being
out of focus. |
|
 |
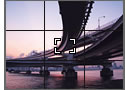 You
can turn on display of grid lines on the monitor
screen. The grid helps to compose
images and helps to ensure that you are holding the
camera straight. You
can turn on display of grid lines on the monitor
screen. The grid helps to compose
images and helps to ensure that you are holding the
camera straight. |
|
 |
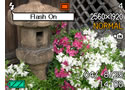 Icon
Help display guidance text about an icon when you
select it on the monitor screen while in a REC mode. Icon
Help display guidance text about an icon when you
select it on the monitor screen while in a REC mode. |
|
|
|
|
|
|
|
|
| *Screen images shown in this website
are simulations for explanatory purpose only. |
|
|
|
|